Building a Good Karaoke System – Part 1
This is more of a chart of my journey from the beginning, rather than a expert authority on the subject. So if you are somewhat of a karaoke novice with a decent budget ($1000 give or take) and an existing home theatre that you would like to integrate your Karaoke system into.. this might be a good read.

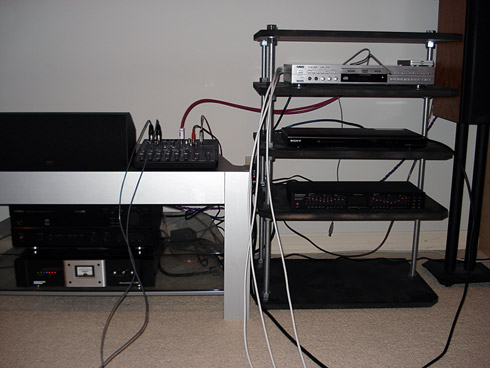
I decided I was going to set up a Karaoke system in my house, and noticed that a lot of guys out there that had people set up theirs professionally had mixers and professional microphones hooked up instead of using the built-in Microphone inputs typically found in Karaoke machines. I found it really difficult to find the information I needed to put together something decent. What I did know was that I needed a Pro Audio Mixer at least to get decent Microphone preamplification in addition to whatever type of Karaoke Source machine I used. So that’s where I started.
The number of Karaoke Source machines out there is infinite, as are the number of Mixers! Especially when you don’t really have a clear idea of what you are looking for. The problem with mixers as well is that they do not always have Key Control and Reverb (echo) Effects, which are used commonly in Karaoke. The problem with Karaoke Sources is that if you go CD+G, you have to build up a big library at considerable cost. If you go with a Karaoke PC, you have to spend a lot of money right from the get-go, but you get a lot of music that you can add to quite affordably. There’s always Midi Karaoke as well, but if you are going to go this far to build your system, you probably want a high quality Karaoke Source to go along with it.
I decided after a lot of back and forth to get the Karaoke Player first, and worry about the microphone amplification afterwards.
Karaoke Player Source Machine and Format
After checking out the commerically available sources, and seeing a lot of the chinese knock-off Karaoke song machines out there, I decided I would stick with the SCD+G or SUPER CD+G format. This format is good because it is essentially a MP3 and a CDG files for the text or graphics.
Super CD+G discs are very easy to purchase at the cost of around $80-120 for a disc containing approximately 400-1200 songs. The other option is to burn your own home made Super CD+G’s with downloaded MP3+G files. I will talk about that process later.

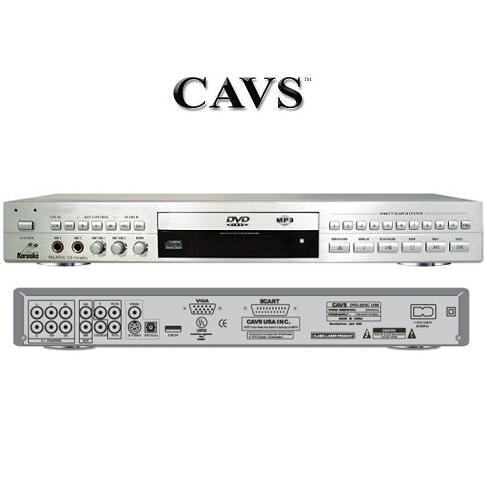
The only machine out there that offered a robust build, affordability and the ability to add a USB Harddrive or Flashdrive was the CAVS 203G USB. The 103G USB was an inferior unit, with a more fragile build, and didn’t cost much less, so I chose the 203G. This player allows you to connect a USB Harddrive to it, as long as it is formatted in FAT32 format. The player costs around $225 or so without the harddrive and even includes a decent free microphone.
I tried both using a Flash Drive and a USB Harddrive with my 203G USB, and they work great. I have had the odd crash while using it, but this happens infrequently, and in home use is not a big deal. Remember to purchase the USB version if you wish to download your own songs and put them on a harddrive, which costs about $100 for 160gigs. The standard 203G only accepts CDs and DVDs and has no USB input.

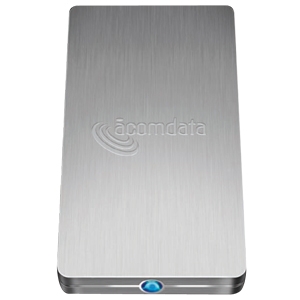
The harddrive I purchased was the Acomdata Hybrid Drive 160gig, but you can use just about any drive out there. I chose this drive due to cost and the fact that it was already formatted in a FAT32 format. This makes life easier for me.
NOTE: I have since discovered that this harddrive does not work on a friend’s 203G USB system in another house, causing crashes shortly after playing one song. It may require the additional power supply to work. I am in the process of testing additional units out, and will publish them here when I find a solid unit.
This player also has two microphone inputs if you do not wish to use a mixer with your set up.. however, having tried a mixer, I wouldn’t do it any other way.. stay tuned for part 2 of this article where I’ll talk about the programs I used to create the song format for the USB Harddrive as well as creating a Songbook to pick your music.
Go to Part 2.

[…] See Part One. […]