Building a Good Karaoke System – Part 2
See Part One.
In this next installment of my Karaoke system building, I will talk about how I got the songs onto the AcomData harddrive and made them work with my CAVS 203G USB karaoke machine. This part is one of the more technical and computery parts of this series of articles, and a little bit less gearhead. I feel that even if you buy a whole bunch of SCD+G’s you can find, there are always some songs that are going to be missing which you will have to track down and learn to add to a flash drive or USB harddrive if you want them – or perhaps burn your own Super CD+G’s.
I didn’t try to burn a SCD+G, however the process is much the same as I will be outlining here, but you will have to encode the files to a SCD+G format afterwards. I’ll also go through the process of how to create a songbook from the files. It is not the simplest process, but it worked for me.
Downloading and Prepping the Files
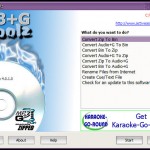
You can download your MP3+G files from anywhere. This may not be the most ethical thing to do, but whatever – I’m a poor boy. You can procure them from your local bittorrent site, or limewire, etc. Once you have the files, they will be likely in a series of .ZIP files or a series of .MP3 and .CDG files. Ultimately you want a folder full of .MP3 + .CDG’s. If they are in .ZIP format, you can unzip each and every file, which is time consuming, or install MP3+G Toolz. Once it is installed, you can just right click the folder with all the .ZIP files in it and choose MP3+G Toolz and then select Convert ZIP to Audio+G. Then you will have a folder full of .MP3 and .CDG files
Once you have your folder full of .MP3 and .CDG files, you can commence the MCG file creation process. Ultimately, the new format requires a type of file called an MCG file, which is a combined format that joins the MP3 and the CDG file into one. The extension is still .MP3, however.
For this process, you will need the program IPS Manager. It is available free from the CAVS website. This program is slightly confusing at first, but is quite easy to use once you get the hang of it. Its very poorly designed either way you look at it, however.
What you need this program to do is to generate the Song Titles as stored in the IDv3 tags on the MP3 files as well as number the files for the INX and the filenames themselves – in addition to creating the MCG file itself, of course.
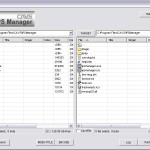
This is what the IPS Manager Program looks like:

The left is where your MP3 + CDG files are located, and the right is where you want the new MCG files to be created. I suggest simply creating a subfolder where the MP3 + CDG files are for that.
On the left pane, you need to navigate to where your MP3 + CDG files are, and then click the checkbox: Check All. After that you click on “INDEX-TITLE” and then select the “Auto : Start No.” Radio button and enter “1” into the box. This tells the program that you are starting at the beginning. If you were adding additional songs then you would enter the next number in your series of songs, but this should be your first time, or you wouldn’t be reading this 🙂
In the section below, you want to click on the radio “Use File Name as Title“, then click “OK”. This should title all your MP3 files and also index them. Now you can begin the encoding process. Click “ENCODE” and make sure the “Create ENGLISH.INX” radio is clicked. You will need this file to navigate through your files easily. The encode process will go on for a while, depending on how many songs you have.
Copying your files to the Harddrive
Once it is finished, all you need to do is create a folder on the Harddrive you are hooking up to your CAVS 203G USB karaoke machine and copy all the files created by IPS Manager into it, including the ENGLISH.INX file. You MUST create a subfolder on the harddrive, and not copy them directly onto the harddrive as for some reason, the player will not run the ENGLISH.INX index file if it is in the root of the harddrive. I called my subfolder “Karaoke”
Now all that’s left is to turn on your CAVS player and plug in the drive and wait for it to load!
If you are adding songs to an existing batch, it is a bit more complicated as you will need to start the indexing number where you left off, and download the INX Maker program from CAVS in order to generate a new INX file from your Juke.txt files. If you need help with this, you can email me.
NOTE: My player has difficulty starting up if I have the drive plugged in when I turn it on, so I have to plug it in after the player has booted up. You may have the same problem.
In Part 3, I will discuss creating a songbook using the files generated in this process!


[…] Go to Part 2. […]
[…] See Part Two. […]
The Blackberry is the best gadget that i ever received as a gift from my best friend. It has nice features and the design looks very cool too.
That was a awesome post,Maybe I might sign up to your rss.
That was a great post,You discover something new every day.