Building a Good Karaoke System – Part 2

Posted by the dood on Wednesday, October 8th, 2008

See Part One.

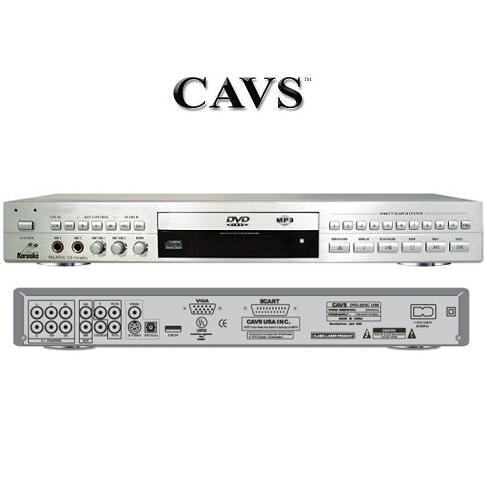
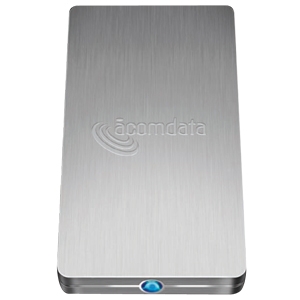
In this next installment of my Karaoke system building, I will talk about how I got the songs onto the AcomData harddrive and made them work with my CAVS 203G USB karaoke machine. This part is one of the more technical and computery parts of this series of articles, and a little bit less gearhead. I feel that even if you buy a whole bunch of SCD+G’s you can find, there are always some songs that are going to be missing which you will have to track down and learn to add to a flash drive or USB harddrive if you want them – or perhaps burn your own Super CD+G’s.

I didn’t try to burn a SCD+G, however the process is much the same as I will be outlining here, but you will have to encode the files to a SCD+G format afterwards. I’ll also go through the process of how to create a songbook from the files. It is not the simplest process, but it worked for me.

Downloading and Prepping the Files

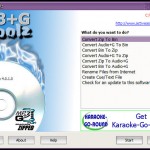
You can download your MP3+G files from anywhere. This may not be the most ethical thing to do, but whatever – I’m a poor boy. You can procure them from your local bittorrent site, or limewire, etc. Once you have the files, they will be likely in a series of .ZIP files or a series of .MP3 and .CDG files. Ultimately you want a folder full of .MP3 + .CDG’s. If they are in .ZIP format, you can unzip each and every file, which is time consuming, or install MP3+G Toolz. Once it is installed, you can just right click the folder with all the .ZIP files in it and choose MP3+G Toolz and then select Convert ZIP to Audio+G. Then you will have a folder full of .MP3 and .CDG files

Once you have your folder full of .MP3 and .CDG files, you can commence the MCG file creation process. Ultimately, the new format requires a type of file called an MCG file, which is a combined format that joins the MP3 and the CDG file into one. The extension is still .MP3, however.

For this process, you will need the program IPS Manager. It is available free from the CAVS website. This program is slightly confusing at first, but is quite easy to use once you get the hang of it. Its very poorly designed either way you look at it, however.

What you need this program to do is to generate the Song Titles as stored in the IDv3 tags on the MP3 files as well as number the files for the INX and the filenames themselves – in addition to creating the MCG file itself, of course.

This is what the IPS Manager Program looks like:
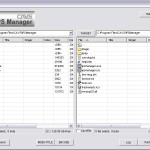
The left is where your MP3 + CDG files are located, and the right is where you want the new MCG files to be created. I suggest simply creating a subfolder where the MP3 + CDG files are for that.

On the left pane, you need to navigate to where your MP3 + CDG files are, and then click the checkbox: Check All. After that you click on “INDEX-TITLE” and then select the “Auto : Start No.” Radio button and enter “1” into the box. This tells the program that you are starting at the beginning. If you were adding additional songs then you would enter the next number in your series of songs, but this should be your first time, or you wouldn’t be reading this 🙂

In the section below, you want to click on the radio “Use File Name as Title“, then click “OK”. This should title all your MP3 files and also index them. Now you can begin the encoding process. Click “ENCODE” and make sure the “Create ENGLISH.INX” radio is clicked. You will need this file to navigate through your files easily. The encode process will go on for a while, depending on how many songs you have.

Copying your files to the Harddrive
Once it is finished, all you need to do is create a folder on the Harddrive you are hooking up to your CAVS 203G USB karaoke machine and copy all the files created by IPS Manager into it, including the ENGLISH.INX file. You MUST create a subfolder on the harddrive, and not copy them directly onto the harddrive as for some reason, the player will not run the ENGLISH.INX index file if it is in the root of the harddrive. I called my subfolder “Karaoke”

Now all that’s left is to turn on your CAVS player and plug in the drive and wait for it to load!

If you are adding songs to an existing batch, it is a bit more complicated as you will need to start the indexing number where you left off, and download the INX Maker program from CAVS in order to generate a new INX file from your Juke.txt files. If you need help with this, you can email me.

NOTE: My player has difficulty starting up if I have the drive plugged in when I turn it on, so I have to plug it in after the player has booted up. You may have the same problem.

In Part 3, I will discuss creating a songbook using the files generated in this process!

Do Narrow Ties look Unprofessional?

Posted by the dood on Monday, October 6th, 2008

I’m noticing that Ties are not only getting narrower, but they are getting shorter as well. To me it has always been the look of teenager emo types, and fashion victims (like i should talk). However, the continued trend of thinner and thiner ties are starting to make 2.5″ or so ties look commonplace. Most of my ties are in the 3″ or wider range, but I am fairly broad shouldered and wear a size 44 jacket and 33 pants.

Seeing pictures like this makes me wonder:

I mean.. I don’t think i can pull that off, it looks like its too small. The above is a J. Lindenburg tie from Revolve Clothing. Does it look professional, or…?

Building a Good Karaoke System – Part 1

Posted by the dood on Wednesday, October 1st, 2008

This is more of a chart of my journey from the beginning, rather than a expert authority on the subject. So if you are somewhat of a karaoke novice with a decent budget ($1000 give or take) and an existing home theatre that you would like to integrate your Karaoke system into.. this might be a good read.


I decided I was going to set up a Karaoke system in my house, and noticed that a lot of guys out there that had people set up theirs professionally had mixers and professional microphones hooked up instead of using the built-in Microphone inputs typically found in Karaoke machines. I found it really difficult to find the information I needed to put together something decent. What I did know was that I needed a Pro Audio Mixer at least to get decent Microphone preamplification in addition to whatever type of Karaoke Source machine I used. So that’s where I started.

The number of Karaoke Source machines out there is infinite, as are the number of Mixers! Especially when you don’t really have a clear idea of what you are looking for. The problem with mixers as well is that they do not always have Key Control and Reverb (echo) Effects, which are used commonly in Karaoke. The problem with Karaoke Sources is that if you go CD+G, you have to build up a big library at considerable cost. If you go with a Karaoke PC, you have to spend a lot of money right from the get-go, but you get a lot of music that you can add to quite affordably. There’s always Midi Karaoke as well, but if you are going to go this far to build your system, you probably want a high quality Karaoke Source to go along with it.

I decided after a lot of back and forth to get the Karaoke Player first, and worry about the microphone amplification afterwards.

Karaoke Player Source Machine and Format
After checking out the commerically available sources, and seeing a lot of the chinese knock-off Karaoke song machines out there, I decided I would stick with the SCD+G or SUPER CD+G format. This format is good because it is essentially a MP3 and a CDG files for the text or graphics.

Super CD+G discs are very easy to purchase at the cost of around $80-120 for a disc containing approximately 400-1200 songs. The other option is to burn your own home made Super CD+G’s with downloaded MP3+G files. I will talk about that process later.

The only machine out there that offered a robust build, affordability and the ability to add a USB Harddrive or Flashdrive was the CAVS 203G USB. The 103G USB was an inferior unit, with a more fragile build, and didn’t cost much less, so I chose the 203G. This player allows you to connect a USB Harddrive to it, as long as it is formatted in FAT32 format. The player costs around $225 or so without the harddrive and even includes a decent free microphone.

I tried both using a Flash Drive and a USB Harddrive with my 203G USB, and they work great. I have had the odd crash while using it, but this happens infrequently, and in home use is not a big deal. Remember to purchase the USB version if you wish to download your own songs and put them on a harddrive, which costs about $100 for 160gigs. The standard 203G only accepts CDs and DVDs and has no USB input.

The harddrive I purchased was the Acomdata Hybrid Drive 160gig, but you can use just about any drive out there. I chose this drive due to cost and the fact that it was already formatted in a FAT32 format. This makes life easier for me.

NOTE: I have since discovered that this harddrive does not work on a friend’s 203G USB system in another house, causing crashes shortly after playing one song. It may require the additional power supply to work. I am in the process of testing additional units out, and will publish them here when I find a solid unit.

This player also has two microphone inputs if you do not wish to use a mixer with your set up.. however, having tried a mixer, I wouldn’t do it any other way.. stay tuned for part 2 of this article where I’ll talk about the programs I used to create the song format for the USB Harddrive as well as creating a Songbook to pick your music.

Go to Part 2.

Yulong AMP4780 Integrated Amp Review

Posted by the dood on Friday, September 26th, 2008

The Yulong AMP4780, another one of China’s exports that claims to provide Hi-Fi enthusiasts with an affordable and compact solution for high quality audio playback. I purchased the Yulong to replace my Creek 4330SE, which is a wonderful sounding peice of kit. The Yulong retails at a much lower price, and can be purchased new (including shipping) for about 1/2 of the price of the a used Creek 4330SE.

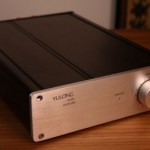
Check out the little guy here:

Depending on who you ask, this amp puts out between 40 and 60 WRMS. The place I bought it from claimed 40WRMS/channel. This is enough to power most bookshelf speakers, especially in a smaller room, and more than enough to power high-efficiency speakers in the 92db+ range. Currently I have it powering a pair of Jungson Beauty Deity BD-1 speakers, which are rated at 85db sensitive in a 250sq ft room.

Impressions
The amp seems adequate for it’s duties in my den, powering the sound from my computer. Oddly, though it is claimed to have tube-like sound and warmth, I felt that this amp does not really have those characteristics, but rather something unique. It does have the midrange bloom that we associate with tubes, however it lacks the warmth, instead having a somewhat more clinical sound, with emphasis in the midrange, with slightly less bass than most solid state.

The top end is clear, and detailed, as is the midrange. I find it very musical and have it playing while I write this review. The size is fantastic, and the large toroidal power supply makes it a nice hefty unit that feels very solid. It was strange that my unit did not come with instructions, though not really necessary, considering that it only has 1 set of inputs and a power switch and volume control.

The bass extends low, but has less emphasis than the Creek and Jungson amps that I had used with these speakers before. It may be that the amp does not have enough current to drive these somewhat inefficient monitors. I tried hooking up a pair of Aurum Cantus Leisure 2 SE’s speakers to the amp, which have a rated sensitivity of 86db, with similar results. I was a bit shocked that at the amp did not have that visceral bass. As a last resort, I pulled my Klipsch RB-5 MKII’s from my home theatre set up and plugged them in. The Klipsch are rated at 96db and are incredibly efficient, however, because of fairly large impedence swings down to 4ohms they don’t sound great with a lot of lower end tube gear.

The Magic Begins
Hooked up to the Klipsch RB-5 MKII’s, this amp sang like I would not believe. The Klipsch RB-5 MKII is one of the most underrated speakers I have owned, and much better than the current Klipsch Reference speakers with the plastic baffles. Similar to the T-Amps, this Yulong has that magical sound that I remember, but with a more robust case and power supply, for a lot less money that one would expect. Heck you can’t even buy all the parts to build this amp for the money.

With the Klipsch speakers, the Yulong has a warm, musical midrange, and that tube sound seems to be there while it was lacking with the other two speakers I had tried. The Jungson and Aurum Cantus speakers are amazing, and I love them with medium to high powered solid state gear such as the Creek 4330SE, but with the Yulong they just did not pair up.

I do highly recommend this amp if you are on a tight budget, and have some relatively high efficiency speakers to spare. I think that is the key to getting good results with it.

Opera Consonance Reference 2.2 MKII CD Player

Posted by the dood on Monday, August 11th, 2008

Chinese-made tube gear has always intrigued me, especially the price-to-performance ratio that can be had especially when purchasing these components on the secondary market. The Opera-Consonance probably is one of the leaders of production CD Players from China for the US Market.

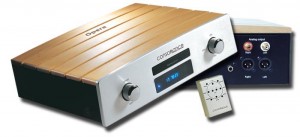
The particular player I have here is the Opera Consonance Reference 2.2 MKII. The MKII differs from the previous model in that it has a Balanced output in addition to the single-ended tube output. The Balanced output uses a solid-state output as opposed to the tubed output of the RCA output.

The player has a volume control built-in so you can use this player without a preamp as well. I found the XLR Output substantially different from the tubed output. Though the XLR was pretty warm as far as solid state gear goes, it does have a mid-rangey sound to it, like much tubed gear does. The laid-back sound combined with the rich midrange gives the player a lot of warmth and prescence with voices, especially male voices.

Listening to Josh Groban on the Opera there is a sense of power to it, and musicality is definately a strong point. This player does impart some character to the music, but its not a bad thing. Its a very enjoyable player to listen to, and at the price point there is not much that can touch it. Having compared many players in it’s price range, most are inferior.

Comparing my Bel Canto CD-1 with my Opera Consonance does reveal that the Bel Canto has much more air in the top end and detail. The Bel Canto has a decisively more neutral and digital sound to it, while the Opera is much more warm and heavier in the midrange.

Overall the Opera is a heck of a player, and I could definately live with it in my system for a long time.